Open USB stick via autoplay
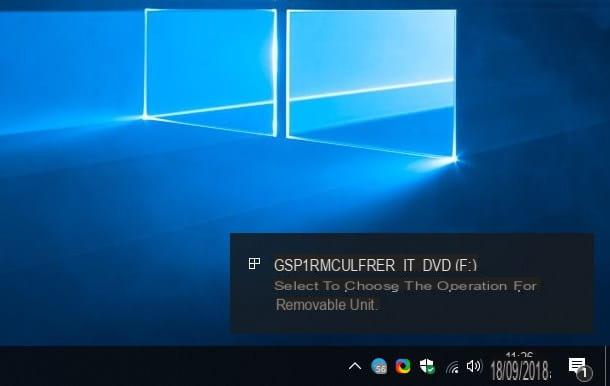
The first method for open USB stick on Windows 10, as well as the simplest, is to use the functionality of automatic playback Microsoft operating system: by doing so, Windows will propose a series of choices to manage the drive just inserted into the system; choices that can be selected with a click.
To use it, the first thing you need to do is connect the key to one of the free USB ports on the computer and wait for a notification balloon to appear in the lower right corner of the screen about the insertion of the new device. Without delay, click on the latter (which is displayed only for 10 seconds) and, using the box that appears at the top, choose the operation to be performed that is most appropriate to your needs.

For example, you can choose to Open the folder to view the files within a File Explorer window (the Windows file manager), Play audio files present on the key via one of the multimedia programs installed on the operating system, Play the photos in presentation mode or simply do nothing. Keep in mind that the choices available during automatic playback may vary both according to the programs installed on your computer and based on the contents of the key itself.
If you wish, you can turn off the autoplay feature (or AutoPlay) for USB sticks or, in general, for all devices, using the panel Settings. To proceed, open the menu Home by clicking on the icon in the shape of pennant placed in the lower left corner of the screen, presses the button (I.e. and then on the voice devices resident in the panel that is shown on the screen.

When you reach the next window, go to the section AutoPlay by clicking on the homonymous item and choose the operation to be carried out for each of the devices already connected to the computer at least once: to disable the appearance of the notification balloon and therefore of the automatic execution functions, you must set the item No operation for each of them.
If, on the other hand, you want to disable AutoPlay for all devices that will be connected to the computer (USB sticks, optical media, smartphones, cameras, and so on), known and unknown, you simply have to move to Disabled the switch located immediately below the item Use AutoPlay for all media and devices.
Once this is done, you will have to open "manually" the devices whose content you intend to read, as I explained in the next section, using File Explorer.
Open USB stick via File Explorer

Were you unable to click on the comic in time or, again, the autoplay options were turned off and the notification didn't appear at all? You can still view the files on your USB stick using File Explorer, the manager built into Windows.
To use it, click on the icon gialla poster located in the lower Windows bar, identifies the section What PC resident in the left part of the window and, if it is collapsed, expand it by clicking on dart corresponding. At this point, you simply have to click on the icon related to USB pendrive (With art. Kingston (F:)) to immediately view the files and folders contained within it.
Alternatively, you can get the same result by double clicking on the icon What PC placed on the desktop and, subsequently, repeat the operation on the icon that identifies the USB key resident in the box Devices and units.
Open USB stick via Disk Management

If you are unable to view the contents of your USB stick with either of the two methods discussed above, since it does not appear in File Explorer, you can try to open it using the integrated disk management utility.
Usually, this solution is extremely effective when Windows 10, for one reason or another, manages to read the key correctly but cannot assign it a drive letter with which to identify it in File Explorer.
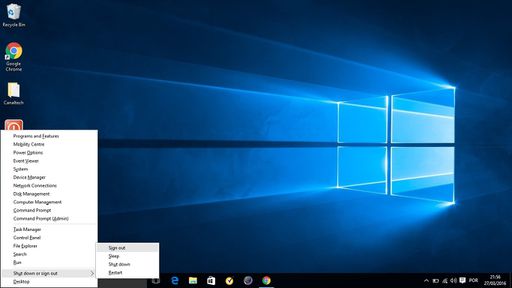
To proceed, do click destroy on the button Home located in the lower left corner of the screen and select the item Disk management from the menu that opens. Next, identify the name of the USB stick in question (eg. Kingston) from the list of storage drives connected to the computer, do click destroy on it and select the item Change drive letter and path ... from the proposed context menu.
At this point, click on your button Aggiungi ... placed in the small window that opens on the screen, put the check mark next to the item Assign this drive letter, select the first free letter (eg. F:) from the corresponding drop-down menu and presses the button OK to confirm the assignment.

If everything went well, you should be able to view the contents of the key in File Explorer: to check it immediately, do once again click destroy on the USB key icon in the Disk Management window and select the item apri from the proposed context menu.
Note: to avoid unexpected behaviors from any "dated" programs, avoid assigning the letters to the key A: e B:, as originally dedicated to floppy disks.
In case of problems
You slavishly followed the instructions I gave you in the course of this guide, but you still failed to open USB stick on Windows 10? Then the problem may be a little more serious than it appears: you can try to fix it by following the instructions below.
Check that the key is intact / correctly formatted

If you have the possibility, try to insert the same USB key in another computer with Windows: if this does not work or returns the error "Disk drive not formatted“, Try to reformat it following the procedures I explained to you in this guide; even if this option fails, you may have to consider purchasing a new key.
If, on the other hand, the USB drive is fully functional on a second PC, then continue reading the following sections, as the problem is to be found in the computer you are using.
Verify that the USB ports are enabled

Sometimes, it may happen that the USB ports of the computer are disabled by the operating system for a number of reasons beyond the user's control: to check if this is the case for you, you must go to the device management panel of Windows 10 and enable again the ports eventually disabled.
How? Very simple: do it click destroy sul tasto Home (l'icona a forma di pennant located in the lower left corner of the screen), click on the item Device management placed in the menu that opens and wait a few moments for the management panel to be completely loaded.
At this point, locate the item Controller USB, click on it to expand it and check if one or more USB ports on the computer are disabled: in this case, there should be a black symbol next to each of them.
To enable them again, do click destroy icon of the door in question and select the item Attiva from the menu that appears: then wait for the port to be reactivated (after re-loading the list of devices, the black symbol should disappear), insert the USB key into the computer and check that it is finally opened.
Reset the USB controllers

Did the previous solution fail to restore the correct functioning of the USB ports? The last word is not yet said: you can try to restore their drivers by temporarily uninstalling them from the system.
First, therefore, go to the panel Device management as I showed you a moment ago, expand the item related to Controller USB, do click destroy on each of the devices listed in its correspondence and select the item Uninstall from the proposed context menu. After completing this procedure, restart your computer, wait for Windows to automatically install the device drivers and try connecting the USB stick again.
Unlock the USB ports

Haven't you been able to open a USB stick on Windows 10 yet? As a last resort, I recommend that you see if access to the USB ports has been blocked, voluntarily or unintentionally, via the registry.
To begin, press the key combination Win + R, type the command regedit inside the small window that opens, presses the button Submit and then on the button Yes to grant the necessary permissions to the registry.
In the window that opens, locate the left sidebar, click on the arrow located next to the item HKEY_LOCAL_MACHINE and repeat the operation on the items System, CurrentControlSet e Services. Now, click on the item USBSTOR, identify the key Home placed on the right side of the register and do Double-click on the same: type the value 3 in the box below the item Value data: attached to the window that opens, click on the button OK and restart your computer.
Once this step is complete, insert the USB stick back into the computer and, if everything went well, you should finally be able to read its contents.
How do you say? Couldn't you figure it out this time either? As a last resort, I recommend that you take a look at the settings panel of theantivirus or any other protection program that you have installed on your computer: you may have unintentionally activated the read lock of external USB devices.
How to open USB stick on Windows 10


