Create virtual desktops on Windows 10
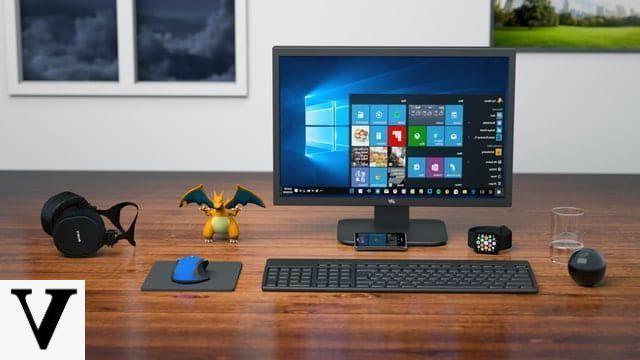
If you want create virtual desktops on Windows 10, you can use the function Activity view that Microsoft has integrated into the most recent version of its famous operating system. Are you wondering how to use it to create virtual desktops? I'll explain it to you right away.
To begin with, click on the button for the function Activity view (the icon depicting three rectangles which is located at the bottom left, next to Cortana's search bar). If you don't see the Task View icon, you've probably changed some Windows 10 settings related to the appearance of the taskbar. In this case, right-click anywhere on the taskbar (be careful not to right-click on the icon of any program present in it), select the item Show Task View button in the menu that opens and, as if by "magic", the icon in question will appear.

Now, to create a new virtual desktop, click on the icon Activity view and click on the button (+) New desktop located in the lower right corner. To create other virtual desktops, all you have to do is repeat the operation just described. Easier than that ?!
After creating the virtual desktops, you can "browse" by clicking on the icon again Activity view and then clicking on thepreview of the desktop you want to view. Alternatively, you can switch between virtual desktops by simultaneously pressing the keys Windows + Ctrl + Left Arrow / Right Arrow or by making one swipe with three fingers on the touchpad from right to left or from left to right (if your PC's touchpad supports gestures).
To clear the virtual desktops you created on Windows 10, click the icon again Activity view, hover your mouse cursor over the thumbnail of the desktop you want to delete and click on (X) located in the upper right corner of the latter.
Please note: if you have a touchpad that supports gestures, you can also call up Activity View by swiping three fingers from bottom to top.
Other solutions to have virtual desktops on Windows

Isn't the feature to create virtual desktops present by default on Windows 10 to your liking? You haven't upgraded your PC to Windows 10 yet and would like to know if it is possible to take advantage of a similar functionality by resorting to third-party solutions? Of course it is possible! Below I show you how some of them work programs to create virtual desktops which are really well made and easy to use. Try it for yourself!
VirtuaWin

One of the third-party solutions that I recommend you try to create virtual desktops is VirtuaWin, a completely free and open source software that is compatible with practically all versions of Microsoft's operating system: from the "prehistoric" Windows 9x to the most recent Windows 10. Being also available in a portable version, you can use it without having to perform any installation procedure .
To proceed with the VirtuaWin download, connect to the program's website and click on the link VirtuaWin x.x (Portable version). Then extract the contents of thezip archive just downloaded and then start the program VirtuaWin.exe.
Nella finestra che si apre, click on your button OK and, to switch between virtual desktops, use the key combination Ctrl + Alt + left arrow / right arrow / arrow or down arrow . Alternatively, you can switch from one virtual desktop to another by clicking on the VirtuaWin icon located at the bottom right (the green rectangle icon in the Windows notification area) and then clicking on the desk name you want to open.
As you can see, VirtuaWin creates by default four desks arranged in a square (using the 2 x 2 format). If you wish, you can customize the layout of the virtual desks by accessing the program settings: right-click on the icon of VirtuaWin located in the notification area and select the item Setup from the drop-down menu that opens.
In the window that appears on the screen, click on the tab General and select the number of virtual desktops you want to display horizontally and vertically using the menus in the section Desktop Configuration: all you have to do is set numerical values next to the captions wide by e deep to choose the number of desks to display. When you're done making these changes, click the button first Apply and then OK.
If you want to use VirtuaWin more comfortably, I suggest you activate the setting that allows you to switch desktops simply by passing the mouse cursor in the area of the screen where there is one of the virtual desks you want to activate. Then click on the tab Mouse (always from the card Setup VirtuaWin), tick the entry Enable mouse desktop changing and by clicking on the button Apply and then on the button OK. Più facile di così ?!
Sysinternals Desktops

Another solution for creating virtual desktops on Windows is Sysinternals Desktops, a free program, easy to use and, above all, very "light". It allows you to simultaneously manage up to a maximum of four virtual desks, each of which with its own windows and programs open.
To download Sysinternals Desktops, go to to the Microsoft website and click on the link Download Desktops located at the top of the page. When the download is complete, double-click on it and open thezip archive just downloaded, extract the contents into any folder and run the executable Desktops.exe to start the program.
Nella finestra che si apre, click on your button Agree to accept the conditions of use of the software and configure the latter according to your preferences: put the check mark next to the entry relating to the keyboard command you want to use to switch from one desktop to another (eg. Other, Control, Shift o Windows), the keys to be associated with the various virtual desktops (e.g. Number 1, 2, 3, 4 o Function F1, F2, F3, F4) and click your OK to confirm everything.
If you have checked Control and then Number (1, 2, 3, 4), to go to the first desk you have to press the key combination Ctrl + 1; to switch to the second desk, you have to press Ctrl + 2; to switch to the third desk, you have to press the keys Ctrl + 3 and to move to the fourth desk, you have to use the key combination Ctrl + 4.
If you wish, you can also set Sysinternals Desktops so that it starts automatically each time you log in to Windows, by putting the check mark next to the item Run automatically at logon (located in the lower left corner of the main program window). After you have finished configuring the program, click the button OK And that's it.
At this point, you can finally use the key combination you have chosen to create and manage virtual desks or, alternatively, you can click on the program icon (located at the bottom right, in the Windows notification area) and click the button Press to create Desktop [N].
Virtual desktops on Windows: how to get them


