Minimum requirements
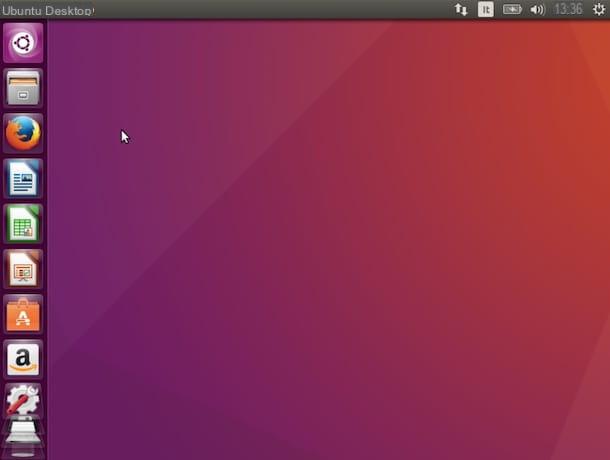
Before seeing in detail how to install ubuntu, make sure your PC has all the credentials to run this operating system. The hardware requirements necessary for its execution, as I told you, are low, but better get informed and do not take unnecessary risks.
- 700 MHz or higher processor (2 GHz or higher dual-core processor recommended).
- 512MB of RAM (2GB of RAM recommended).
- 5GB of disk space (25GB recommended)
- Graphics card with support for a resolution of at least 1024 × 768 pixels.
Also, you must have one decent speed connection to download Ubuntu installation files from the Internet and a Blank DVD or a USB stick of at least 2GB on which to copy the latter.
With regard to the compatibility of video cards, sound cards, network cards and other hardware components with Ubuntu, there should not be any problem. Ubuntu is now compatible with the vast majority of computers in circulation and does not require additional drivers. In any case, before installing the operating system on your PC, try to find out about the compatibility of some specific hardware components (e.g. the network card or printer) by searching the Internet. If you don't know what the exact models of hardware components are on your computer, use Speccy software to easily identify them.
Preliminary operation
Before getting to the heart of the tutorial and discovering, together, how to install ubuntu on your computer, let me give you some advice on what to do before downloading the operating system.
Backup
As mentioned above, installing Ubuntu does not lead to the deletion of Windows or the files on your PC (at least not necessarily). However, when changing disk partitions or installing an operating system, it is always good to be foresight and perform a backup of your data.

Before starting work, therefore, copy your documents, your photos and all the files you care about most on an external media (eg a hard disk, a series of USB sticks or DVDs). It is a bit tedious, lengthy, but necessary procedure. If you want some advice on this, read my guide on what backup is and how to do it.
BIOS configuration
Another operation that, almost certainly, you must perform is change the BIOS settings. Ubuntu must be installed by booting from the DVD or USB stick on which its installation files have been copied, so you must make sure that in the BIOS of your PC the USB drive and the DVD are set as priority over the hard disk ( otherwise Windows will start normally instead of the Ubuntu installation process).
Also, if you use a fairly recent PC (sold with Windows 8.x or Windows 10 pre-installed) you should know that your computer no longer has the BIOS but the UEFI: a more updated version of the BIOS that includes additional functions related to security. One of these functions is called Secure Boot and prevents the startup of operating systems that do not have a special digital signature (basically all systems other than the most recent versions of Windows). Well, to install Ubuntu on a UEFI-based computer it is almost always necessary to go to the settings of the latter and disable the Secure Boot. Find out how to do this in my tutorial on how to enter the BIOS / UEFI.

In some circumstances - when you are unable to boot Ubuntu on a UEFI-based computer - you can activate the mode BIOS Legacy which emulates how old BIOSes work on newer computers. Unfortunately, this feature is not available on all computers and prevents the creation of a dual-boot system (unless you reinstall Windows in Legacy BIOS mode). If Ubuntu is installed in Legacy BIOS mode, you must enable or disable the latter to switch between systems. For more info on this, consult the Ubuntu city website.
Disk partitioning
If you are going to install Ubuntu by creating a dual-boot system with Windows, therefore maintaining the possibility to choose which operating system to start each time the PC is turned on, you must partition the disk in order to leave some free space for the Ubuntu partitions (which will then be created during the installation phase of the operating system).
To reserve space for Ubuntu, you need to use the disk partitioning utility included with your PC. Then click on the button Home Windows (the flag icon located in the lower left corner of the screen), search for the term "Partitions" in the menu that opens and select the icon Create and format hard drive partitions from the search results. In the window that opens, right click on the main partition of the PC disk (eg. C:) and select the item Turn down volume give the menu check if you press.

At this point, use the field Specify the amount of space to shrink, in MB to specify the amount of space to reserve for Ubuntu partitions (at least 20.000MB is recommended) and click on the button Reduce per salvare i Cambiomenti.
When finished, you should get a portion of the disk not allocated (represented by a black rectangle in the partition chart) of size equal to the amount of space you indicated in the field Specify the amount of space to shrink, in MB.

Disabling Windows Fast Startup
If your computer has a version of Windows equal to or higher than 8.x installed, in order to start the Ubuntu installation media correctly you must disable the quick start function provided by the Microsoft operating system.
Then click on the button Home Windows (the flag icon located in the lower left corner of the screen), search "Pannello di controllo" in the menu that opens and select the del icon Control Panel classic from the search results.
In the window that opens, go to Hardware and sound, Then Change behavior of power buttons (under the heading Energy saving options) and click on the option Change options that are not currently available. Click Quindi Sul Pulsating Yes present in the window that opens, remove the check mark from the option Enable quick start e save the changes pressing the appropriate button located at the bottom right.

Download and prepare Ubuntu
Now you are ready to download Ubuntu and copy it to a USB stick or DVD. Before proceeding, however, let me clarify your ideas about the various versions of the operating system available for download.
In addition to being distributed in the desktop and server variants and in the 32 and 64 bit variants, Ubuntu is in fact declined in the versions LTS (Long Term Support) e standard. The LTS versions are released every 2 years and can count on a 5-year support, while the standard ones are released every 6 months and have a 9-month support.
As easily understood, the LTS versions of Ubuntu are delayed by the new features introduced in the standard ones but are generally more stable and have more extensive support. This means that in work environments and, more generally, when you want to be on the safe side, it is better to opt for the Long Term Support versions.
All clear? Well then let's proceed with the Ubuntu download. The first step you need to take is to connect to the Ubuntu city website and click on the button Download it now! located in the center of the page. On the page that opens, choose the Ubuntu version you want to download from the first drop-down menu (standard o LTS), select 32 bit o 64 bit from the second drop-down menu (depending on the type of PC you intend to install the operating system on) and click on Start the download to download the Ubuntu ISO image file to your computer.

Once the download is complete, as mentioned above, you need to burn the Ubuntu ISO file to a blank DVD or copy it to a USB stick of at least 2GB. In the first case you can use any burning software with ISO file support, such as ImgBurn that I reported to you in my guide on how to burn ISO files.
To copy Ubuntu to a stick, however, you need to use the free Rufus application which requires no installation and is extremely easy to use. To download Rufus on your PC, connect to its official website and click on the item Rufus 2.xx located in the center of the page. Then start the program Rufus-xx.exe that is downloaded to your PC and click the button Yespresent in the window that opens.
At this point, select the drive related to the USB key on which you intend to copy Ubuntu from the drop-down menu Device / Unit, click on the CDlocated at the bottom right and select theUbuntu ISO image. When done, select the item MBR partition scheme for BIOS or UEFI give menu to tendin Partition scheme and target system type, set the option FAT32 in the drop-down menu File System and make sure there is a check mark next to the item Quick format.
To conclude, click on your button starts, choose to copy the files to the stick in ISO image mode and click on the button Yes to start the Ubuntu transfer to the USB stick. The procedure should take just a few seconds.

If for one reason or another Rufus doesn't satisfy you, you can create a USB stick with Ubuntu using the free UNetbootin software. Its operation is very simple. Just put the check mark next to the item Disc image, click on the button [...] and select the Ubuntu ISO image. Next, you need to select theunit USB where you inserted the key and click on OK.
Installing Ubuntu
install Ubuntu you have to insert the DVD or USB key on which you copied the operating system into the PC and restart the system. On next boot, it won't boot normally Windows but Ubuntu. If not, go to the computer's BIOS and apply the changes I suggested earlier (in the second chapter of the tutorial).
If you are trying to install Ubuntu via a USB stick and despite changes made in the BIOS / UEFI it fails to boot the drive, try downloading the file bootia32.efi from this website and copy it to the folder EFIBOOT key (this allows you to boot on 32-bit UEFI systems typical of many cheap convertibles). Alternatively try to create the key again in Rufus setting it GPT partition scheme for UEFI like Partition scheme and target system type and dd mode as a way to copy data to the drive.
At this point you should be on the Ubuntu home screen. Then select your language city and then the option for try Ubuntu without installing itor for Install Ubuntu (depending on whether you want to try the system a little bit in live mode or if you want to install it directly on your PC). If you decide to start Ubuntu in live mode, to start the installation procedure of the operating system you have to double click on the icon Install Ubuntu located on the desktop.

In the window that opens, select the cittàn language from the left sidebar and presses the button Install Ubuntu. Then if you have a fast Internet connection, put the check mark next to the items Download updates while installing Ubuntu e Install third party software (...) so that during setup the latest updates for Ubuntu and MP3 codecs for the operating system are downloaded and click on NEXT.

Now you have to choose if install Ubuntu alongside Windows or wipe the disk and install Ubuntu as the only operating system of the computer. Alternatively, you could also select the option Other and manually adjust the disk partitions, but this is an operation intended for more experienced users and therefore I do not recommend selecting it if you do not know where to put your hands.

At this point, if you have chosen the option to install Ubuntu alongside Windows, use the graph that is proposed to you to adjust the percentage of space to be assigned to Ubuntu (or rather, to its partition) on the computer hard drive and go ahead pressing on first Install and then NEXT per due turn consecutive.

Now all you have to do is indicate the time zone to use (eg. Rome), set the keyboard language (ex. city) and go ahead and then enter your username, password and computer name to use on Ubuntu.

At the end of the procedure (it will take about 15-20 minutes), click on Restart nowto restart the computer, extract the DVD or the Ubuntu USB key from the PC and every time the PC is turned on you will be asked if you want to start Ubuntu or Windows. More comfortable than that?

Ubuntu virtualization
Would you like to try Ubuntu within Windows or macOS without having to boot from a USB stick or DVD? No problem. By following the directions in my tutorial on how to virtualize Ubuntu you can create one virtual machine with Ubuntu and test the operation of this operating system without leaving your Windows or macOS work session.
As easily understood, the performance of virtual machines is not equal to that of a real system, but to test Ubuntu "on the fly" and take the first steps in it can be a good solution. Have fun!
How to install Ubuntu


