Preliminary operation
Before getting to the heart of the tutorial, going to explain, in detail, what are the steps that must be taken to be able format Windows Vista, there are some preliminary operations that it is essential that you do to make sure that everything goes the right way. To find out more, please continue reading. Find the explanations you need in the next steps.
Back up your data
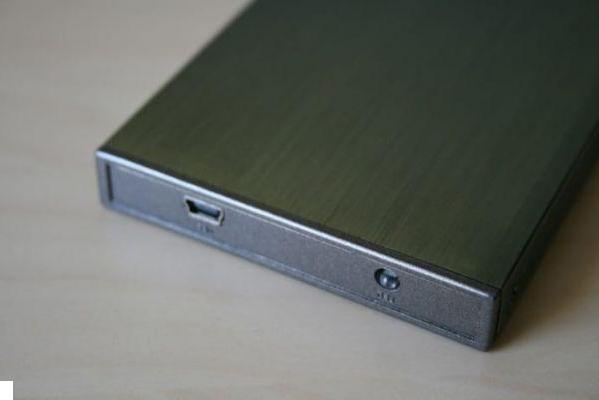
The first operation I suggest you to perform, in view of the formatting of the PC, is the execution of a data backup stored on the hard disk.
Formatting, as I told you at the opening of the post, in fact implies the deletion of all the files on the disk on which the OS is installed. By proceeding in this way, therefore, you can ensure that you access your photos, documents and any other files in your possession even once the procedure is finished.
To make a backup, all you have to do is get a external hard disk (If you do not have a device of this type yet, you can read my buying guide) and transfer your personal files to it, following the instructions on what to do that I have given you in my guides on how to transfer files to hard external disk and how to back up your data.
Get the Windows ISO image

To format Windows Vista you inevitably need theISO image of the operating system, without it the procedure cannot be put into practice.
If you have the installation disk Windows Vista at your fingertips, you don't have to do anything else, everything you need is already in your possession. Therefore, you can use the latter directly.
If, on the other hand, the PC on which you want to reinstall the system does not have a CD / DVD player, you can first buy an external one (in this regard, I recommend reading my purchase guide dedicated to burners) or, in alternatively, you can extract the ISO image of the Vista DVD using a PC equipped with an optical reader, as I explained to you in my guide on how to create ISO files, and then transfer it to a USB pendrive to use to install the OS on your PC.
In the unfortunate event that you don't have the Windows Vista installation disk at hand, I'm sorry to tell you, but to date there are no other legal systems for obtaining the ISO. In fact, since Vista is an obsolete operating system, it is no longer possible to purchase the installation CD / DVD (and its product key) or download the ISO image from the Microsoft website.
Configure the BIOS

To be able to format Windows Vista, either using the installation CD of the operating system or the pendrive with the ISO image of the same, you must also worry about change the boot order of devices on your computer, making sure that, depending on the case, the CD / DVD player or the USB port to which you are going to connect the key are started before the hard disk on which the OS is installed.
To do this, you need to take action on the BIOS (acronym for "Basic Input-Output System"), as I explained in detail in my tutorial dedicated specifically to how to enter the BIOS. In case you are not aware of it, the BIOS is nothing more than the software that resides in a chip placed on the motherboard of the PC, which contains all the instructions to start the operating system and put the hardware part in communication with that software.
If you then use a recent PC that, instead of the BIOS, uses the system UEFI, you should be able to disable the Secure boot and activate the mode Legacy BIOS: I told you about it in the tutorial dedicated to the BIOS linked above
How to format Windows Vista

Having completed the preliminary operations described in the previous lines, you are finally ready to take action. So let's see what needs to be done to be able to format Windows Vista using the operating system installation disk.
First, insert it into the CD / DVD drive connected to your computer, then restart Windows. Then, wait for the wording to appear on the screen Press any key to boot from CD-ROM or DVD-ROM and press any key on your PC keyboard to start the operating system installation process.
Now, wait a few seconds for the first screen of the Windows Vista disk to appear, the one with the language selection, and click on the button first NEXT, to confirm the use of thecityno, and then on the button Install, in order to start the wizard for installing the operating system. Therefore, type the product key of your copy of Vista and click the button NEXT to continue further.
Now comes the important part! Put the check mark next to the item I accept the license conditions, in order to accept the conditions of use of the operating system, click on the button NEXT, select (if necessary) the version of Windows Vista you want to use, click on the installation option custom and click on thehard drive you intend to format to reinstall Windows.
Successively click on your voice Drive options (advanced) located at the bottom right and first press on the button Format and then on the one with it written OK to, in fact, format the drive you have selected. when the operation is completed (it takes a few seconds), click on the button NEXT and wait for the first part of the Windows Vista installation to complete with restarting the PC.
The next time the computer starts, do not press anything when the message appears Press any key to boot from CD-ROM or DVD-ROM and wait for the Windows installation to complete. Within a few minutes, the computer will restart again.
After the second reboot, you can finally start using your PC by completing the procedure of initial configuration Windows Vista where you can set all your preferences for language, time zone, security, etc. and create your user account. At the end, you will find yourself in front of the desktop and you will be ready to start using your PC again now more responsive than ever. It was easy, wasn't it?
How to format Windows Vista without CD

You cannot use the Windows Vista installation disk, you have obtained the ISO image of the OS as I explained to you in the step at the beginning of the guide and you would like to understand how to format the operating system by creating a pendrive with the relative files installation? Well, then all you have to do is get one empty USB stick (or anyway without any important files inside, as it will be formatted) from at least 4 GB and connect it to your computer.
Next, download Rufus, a program at no cost thanks to which, in fact, it is possible to create bootable USB sticks of all versions of Windows (and other operating systems). Note that it is also available in a no-install version. To proceed with the download, go to the software site and click on the link Rufus xx Portable placed at the section Download.
If you want to use the program directly on Vista, the version of the program you need to download is 2.18, which is the latest compatible with the OS in question. To do this, connect to this page (the download will start automatically).
Once the download is complete, open the .exe file ottenuto, click on your bottone Yes (if you are using Windows 7 or later) or on that Allow (if you are using Windows Vista) to allow the program to start and (again) on the button Yes to check for updates. Once the Rufus window appears, make sure that in the drop down menu Device / unit which is located at the top, your pendrive is selected (otherwise you can do it yourself).
Now, if you are using the latest version of Rufus, check that in the drop-down menu Bot selection the option is selected Disc image or ISO (select) (if not, always do it yourself), click the button Select adjacent and select the ISO image Windows Vista.
If, on the other hand, you are using the version of the program compatible with Windows Vista, choose the option ISO image from the drop-down menu attached to the section Formatting options, click on the adjacent button depicting a CD player with a diskette and select l'ISO of the operating system.
After doing this, Rufus' parameters should automatically change to suit the chosen operating system. However, to avoid problems of any kind, check that the items are selected MBR / MBR partition scheme for BIOS or UEFI-CSM in the section Partition scheme e NTFS in the section File System.
Finally, click on the buttons starts e OK located at the bottom and wait for the key with the Windows Vista image to be created by Rufus.
At the end of the procedure, if the computer you are using is different from the one you want to format, disconnect the pendrive from the PC and connect it to the USB port of the reference station. If, on the other hand, the PC to be formatted is the current one, leave the pendrive connected and restart it.
The next time the system is started, the procedure for formatting Windows Vista will start automatically. At this point, the steps to take are practically the same as I described in the previous step, absolutely nothing changes.
How to format Windows Vista and install a newer version of Windows

Considering the fact that Windows Vista is quite dated and starting from 11 April 2017 Microsoft no longer provides security updates of the operating system, if you have the possibility, I strongly suggest you to format your PC yes but to install it on a latest version OS of the Redmond company: Windows 10, Windows 8 or Windows 7.
If you are interested in this and would like to receive useful information about it, you can refer to my specific guides on how to install Windows 10, how to install Windows 8 and how to install Windows 7 to find out how to proceed.
How to format Windows Vista and install Ubuntu

Again by virtue of the fact that, as I told you in the previous step, Windows Vista is a rather old operating system, if you do not want or cannot format your PC and resort to using a more recent version of one of the home operating systems Microsoft, you can evaluate the idea of install Ubuntu o another Linux distribution, which can work without particular problems even on older computers and with hardware features not exactly at the top.
If the topic interests you and you want to receive more details, I suggest you read my guides dedicated specifically to how to install Ubuntu and how to install Linux.
How to format Windows Vista


